The following steps describe how to open a new Leap application
and build a form.
You want your coffee feedback to have:
- An area that contains the title of the form, and a description
of the purpose of the form. Include the amount of time that is needed
to complete the form.
- An area that contains the name of the submitter. Also included
in this area if the form is the basic question: "Do you drink the
coffee that is brewed in the office?"
- An area that contains the survey questions.
Creating an application – When you start Leap,
a screen is displayed with two tabs on the Forms toolbar: Use and
Manage. The Use tab displays a list of all
applications that are created by other users to which you have access.
The Manage tab is where you create and manage
applications.
-
Click New Application.
-
Enter a descriptive Application Name and Application Description,
and select Create.
A blank form
with a two-by-two grid is displayed. The grid automatically aligns
form items with one another when you place them on the form, and expands
as you add form items. You can add and delete columns and rows as
needed by clicking the border bar surrounding the grid.
Note: As you add sections and form
items to the form, the grid automatically expands to include the additional
form items. You can add extra rows to your form manually, but it is
not required. If there are empty rows or columns in a completed form,
they are not displayed when the form is previewed or deployed.
When you design forms, there are two ways to add form
items to your form:
- You can drag form items from the Palette onto the form
- You can select a location on the grid, then click a form item.
The form item is placed into the grid location.
You can build forms by placing form items directly on
the form or grouping form items in Sections. For our coffee feedback
form, we use Sections to organize the form items. Sections are useful
for the following reasons:
- They group form items in a way that is easy for the user to understand.
When the form is viewed, the sections have specific background colors
that are based on the style that is applied to the form.
- They make applying complex form functionality easier. For example,
our form has a rule to hide the survey until the user selects a specific
option. Instead of setting the rule on every form item individually,
the rule is on the section. The rule applies to every form item within
the section.
- They allow the form designer, and the form user, to collapse and
expand entire parts of the form. In longer forms, collapsing sections
is useful, as it keeps the form submitter from being overwhelmed by
too much information.
- If you finish building your form and decide to change the layout,
moving sections of form items is much easier than moving each form
item individually.
Creating the general information area:
The general information area contains the title of the survey, more
information for the form submitter, and an estimated time for completion.
-
Drag a Section onto the form. The
Section is placed into the grid area, and is highlighted to show the
section has focus.
Notice that the Section contains a grid
within it. Form items for a section are added to the grid of the section.
-
Click the field spanning handle and drag it to extend the
section over both columns.
You can resize any form item to span across multiple rows or columns.

-
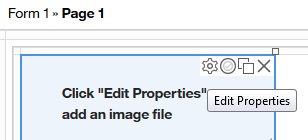
Click a grid box, then select Image from
the Palette.
The image form item is added to the form. You can edit many form items directly on the form,
but others require you to open the Edit Properties window. To display the
list of available options for any form item, click the Edit Properties
icon.
The Edit Properties window opens.
-
Click Add file, then Browse to
locate the logo of your company. If you do not have a logo, browse
to a small resolution image on your computer.
-
Click Open to select the image, OK to
close the Add File or URL Link window, and again
to close the Edit Properties window.
The
image is added to the form.
-
Add a Text item to the Image.
This text item contains the name of the survey.
-
In the Size menu, set the font
size to Large, then and Bold.
Type Workplace Coffee Feedback and click OK.
The formatted text is inserted into the form.
Note: You can adjust
the spacing between form items by dragging the slider in the border
bar. The mouse changes to a slider, and you can adjust the proportions
of the form items.
-
Add another Text item with the image.
Using the field spanning handle, drag the form item to span both columns.
-
Enter the following text: We’d like
your feedback on coffee services in the office. Complete the survey
to provide your feedback. Time to complete survey: 3 minutes or less.
-
Click OK to add the text to the
form.
-
Save the form, either by pressing Ctrl + S,
or by clicking the Save icon.
Creating the primary information area:
Now, create the section that collects the name of the submitter, and
asks the basic question of “Do you drink the office coffee?” You
want to have 100% participation, but not everyone in the office might
drink coffee. By allowing users to submit the survey with a negative
response, you receive a complete set of data. Set a rule on the survey
section to ask coffee-relevant questions only if the submitter indicates
that they drink the office coffee.
-
Add another Section to the form.
-
Click the field spanning handle and drag it to extend
the section over both columns.
-
Click a grid box, then click Single Line Entry.
The Single Line Entry is placed onto the form. Edit the title
of the Single Line Entry directly on the form.
-
Click the title of the item: “Single Line Entry”.
The text is highlighted, and is now editable. Change the text to read: Your
Name.
-
Click Add hint... and type “Enter
your given name and surname.”
The hint is displayed
directly on the form.
Tip: Adding information to the hint
fields gives more information that helps the user complete your form.
For example, in this form, you ask for the user name. The hint helps
clarify whether you want given name and surname, given name only,
or given , middle, and surname. You can also provide more clarification
for users by inserting place holder text into each Single
Line Entry item. Place holder text is available in the Basic tab
of the Edit Properties window, and is available
for any form item where the user must type information. For example,
Single Line, Multi-Line, Currency, Number, and Email.
-
In the Single Line Entry on the canvas, click the box
that is labeled Click to set as required.
Users must complete this field to submit the form.
-
Select Select One from the Palette
and put it in a grid area with the Your Name text
item.
-
Click the Edit Properties icon.
The Properties window opens.
-
Change the Title: to Do
you drink the office coffee?
-
Click the Required check box
to make this question mandatory.
-
In the Options: section, one option
is automatically available. To add another option, click the Add
option plus sign. Set the options to:
- Yes
- No, I drink other hot beverages.
- No, I don’t drink hot beverages.
Displayed Value and Saved Value –
When you use any form item that has Set Options,
two fields are displayed: Displayed Value and Saved
value. As you type in the Displayed Value, the Saved Value
is automatically updated with the same value. There are some cases
where the Saved Value differs from the Displayed Value. For example,
our Displayed Value questions are long. If you export the data from
a Leap application
to a spreadsheet, the selected answers are truncated and the data
might be difficult to interpret. If you change the Saved Values of
the three questions to “Yes”, “Other”, and “No”, or
assign numerical values, the results are easier to understand.
-
Click OK.
-
Save your form and preview it.
The Preview icon
is located with the Save icon.
Note: Ensure that your
browser does not block pop-up windows, as the preview form opens in
a new window or new tab, depending on your browser settings.
Notice
that the Submit and Cancel buttons
are automatically added for you. While you can enter data into the
form in Preview mode, you cannot submit a form until it is deployed.
To
return to building the form, close the tab or the browser window in
which the preview opened.
Creating the survey:
Now create the section which contains the survey questions. This section
has a rule set on it, so if the user selects “No, I drink other
hot beverages” or “No, I don’t drink hot beverages”,
the survey is not displayed. First create the rule, then add the survey
to the section.
-
Click the border bar to access the row action menu. Select Insert
Row (after).
-
Click Section from the Palette,
then click the form. Extend the section over both columns.
-
Click the Rules icon.
The Rules window
opens.
-
Click Add Rule.
-
In the When this is true: section,
select Do you drink coffee?.
-
Set the operation to Does not equal.
-
Leave A fixed value in the next
menu and select Yes.
-
In the Perform this action section,
select Survey in the first menu.
As
you build the rule, it is automatic error checking is performed. If
there is an error in the logic, either a warning sign or an error
sign is displayed. As this rule contains no errors, a verification
icon is displayed.
-
Select Hide in the second menu.
-
Click Apply and Close to save
your changes and close the Rules window.
The rule is now set so when a user responds that they don't
drink coffee, they are not shown the survey about what type of coffee
they prefer.
Now that the rule is set, add the survey questions
using:
- Two Survey form items: one to ask what
roast of coffee the employees prefer, the other to ask them questions
about the coffee provided.
- A Select Many form item to provide more
information about what they like or dislike about the coffee.
- A Multi-Line Entry form item to provide
detailed comments.
-
Select Survey from the Palette and
add it to the section grid. Extend the survey over both columns.
-
Click the Edit Properties icon.
The Edit Properties window opens. Set the
following properties:
- Title: – Coffee preference
- Hint: – What type of coffee
roast do you prefer?
- Options:
- Dark Roast
- Medium Roast
- Light Roast
- Decaf
-
Click OK.
-
Change the survey question from the default “Click
to edit” to I prefer to drink:
-
Select Survey from the Palette and
add it with the Coffee preference survey. Extend the survey over both
columns.
-
Click the Edit Properties icon.
Set the following properties:
- Title: – Please rank each
question:
- Options:
Table 1. Displayed and Saved
values for survey options..
| Displayed Value |
Saved Value |
| Totally agree |
5 |
| Somewhat agree |
4 |
| Agree |
3 |
| No opinion |
0 |
| Somewhat disagree |
2 |
| Totally disagree |
1 |
If you export the data to a spreadsheet program, each user’s
response displays as the numerical code, rather than the Displayed
Value. Tabulation of results is easier as you can sort the submitted
responses by Saved Value numerical indicator.
-
Click the Advanced tab.
The
Advanced tab for each form item contains extra editable properties,
such as ranking labels. Ranking labels are displayed before and after
the Displayed Value. Set the following properties:
- Select Display before and after labels.
- In the Before label: text box, typeAgree.
- In the After label: text box, typeDisagree.
-
Click OK to save the survey properties
and exit the Edit Properties window.
-
Change the survey question from the default “Click
to edit” to: I like the coffee at work.
-
Click Add question to add another
row to the survey. Change the survey question to: If changes
were made, I would drink more coffee.
You can
repeat this step to add more questions to the survey.
An alternative to multiple survey questions is to
add a Select Many form item where users can
select multiple choices from a list.
-
Click Select Many from the Palette
and place it onto the form near the survey. Extend the Select
Many form item over both columns.
-
Click the Edit Properties icon.
The Edit Properties window opens. Set the
following properties:
- Title: – I find the coffee
in the office:
- Hint: – Select all that
apply.
- Options:
- Too acidic
- Too bitter
- Too weak
- Too strong
- Goes cold too quickly
- Too gritty
- Perfect. No changes required.
Note: In the Advanced tab you can change
the orientation of the Select Many choices
by changing the Choice Layout. Changes are
made instantly on the form. You can also select a minimum and maximum
number of choices the user can select.
For
example, you can require the user to select a minimum of two choices
and a maximum of 5.
-
Click OK.
-
Save the form.
To complete the survey form, add a Multi-Line
Entry so users can submit other options, or opinions.
-
Click Multi-Line Entry from the
Palette and place it onto the form with the Select Many form
item. Extend the Multi-Line Entry form item over both columns.
-
Click the Edit Properties icon.
The Edit Properties window opens. Set the
following properties:
- Title: – Please enter
any specific suggestions you might have:
- Width: – Full width.
Selecting Full width results in the space for
entering data automatically adjusting to the size of the form in the
browser window.
- Hint: – For example, a
specific bean blend you’d like us to try.
-
Click OK.
The functionality of the survey is now in place. When
users complete the survey and submit it, they receive a visual confirmation
on the screen that the survey is submitted, and by default, are shown
the survey again. To prevent user confusion, and to prevent the user
from submitting the form again, redirect the user to your company
website after the form is submitted.
Adding a redirect URL
is done in the Stages tab. By default, each
form automatically has a Start stage and an End stage. The Start stage
contains the Submit and Cancel buttons
that are seen when you preview the form.
-
Click the Stages tab.
-
Click the Edit Action Properties icon
for the Submit button.
The Edit
Properties window opens. The Action Completion
Message: has “Your data has been successfully submitted.” as
the default message. You can leave the default, or change the text.
-
In the Action Completion Redirect URL (optional): text
entry area, enter the URL of your company website.
-
Click OK.
-
Click the Forms tab to return to
the main body of the form.
The coffee survey is now
complete. Save and preview the form.
Now that you have built a form, you must deploy it so it is
available for users.